

Old-Fashioned English Breakfast Sausage Patties (Homemade Sage Pork Sausage)
Ingredients
Method
- Prepare the pork. Place the finely ground pork into a large mixing bowl. Make sure the meat is cold before combining the ingredients.
- Add the breadcrumbs. Sprinkle the fine dry breadcrumbs over the pork.
- Mix in the seasonings. Add the salt, white pepper, ground ginger, sage, thyme, and allspice.
- Add the ice water. Pour in the ice water and mix thoroughly until the breadcrumbs and seasonings are evenly distributed throughout the pork.
- Form the sausage patties. Divide the mixture into approximately 10–12 portions and shape each portion into a round patty of even thickness.
- Refrigerate the patties. Arrange the patties on a covered plate or tray and refrigerate for several hours to allow the seasonings to blend and the mixture to firm up.
- Heat the skillet. Place a large skillet over medium heat. If necessary, add a small amount of cooking oil to prevent sticking.
- Cook the sausages. Arrange the patties in the skillet without overcrowding. Cook over medium heat, turning as needed, until evenly browned on both sides.
- Check for doneness. Continue cooking until the centers reach an internal temperature of 160°F (71°C), measured with a food thermometer. Browning and the absence of pink are not reliable substitutes for checking temperature.
- Serve warm. Transfer the cooked patties to a serving plate and enjoy with your favorite breakfast sides.
Notes
- Ground pork: A balanced mixture of lean pork and fat creates flavorful, juicy sausages. A fine grind helps produce a more traditional sausage texture.
- Breadcrumbs: Fine dry breadcrumbs help bind the mixture and retain moisture during cooking.
- Salt: The recipe allows 2–3 teaspoons. Start at the lower end if you prefer less salt.
- Seasonings: Sage, thyme, ginger, white pepper, and allspice create the savory, aromatic flavor associated with English breakfast sausage.
- Ice water: Helps distribute the seasonings and keeps the mixture moist during preparation.
- Chilling: Refrigerate the shaped patties for several hours before cooking to allow the seasonings to develop.
- Alternative sausage links: The mixture can be stuffed into suitable small sausage casings to create links approximately 3–4 inches long.
- Make-ahead option: The recipe can be doubled or tripled. Uncooked patties freeze well when wrapped and stored properly.
- Safe cooking temperature: Ground pork sausage should reach 160°F (71°C) internally.
- Cooking time: The stated 35-minute total does not include the additional several hours required for refrigeration.
- Serving: The mixture makes approximately 10–12 servings according to the supplied recipe.
A traditional English breakfast feels especially satisfying when it includes well-seasoned pork sausage, browned in a skillet and served alongside eggs, toast, and other breakfast favorites.
These old-fashioned English breakfast sausage patties are made with ground pork, breadcrumbs, and a carefully balanced combination of herbs and spices. Sage provides the familiar savory aroma, while white pepper, ginger, thyme, and allspice create a deeper, more rounded flavor.
Here’s what makes this recipe worth trying:
- Classic savory flavor: Sage and thyme give the pork a traditional breakfast sausage character, while gentle warming spices add depth.
- Juicy, tender texture: A balanced mixture of pork fat and lean meat, combined with breadcrumbs and ice water, helps keep the patties moist.
- Simple homemade preparation: You can make the entire sausage mixture in one bowl without complicated equipment.
- Patties or links: Shape the mixture into breakfast patties or use sausage casings to create traditional links.
- Excellent for making ahead: Prepare several batches in advance and freeze portions for future breakfasts.
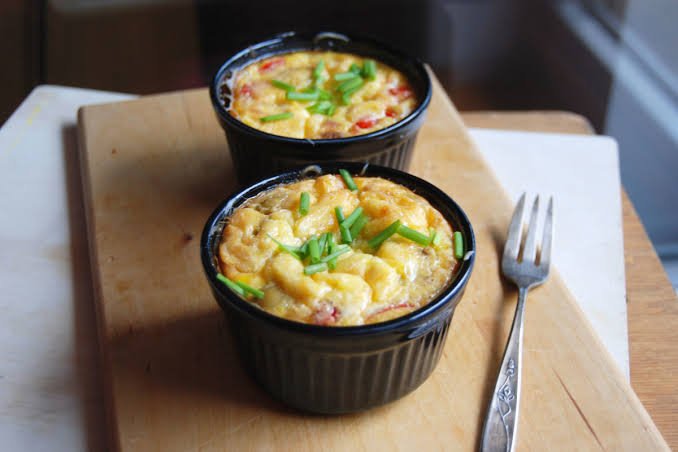
Mini Hash Brown Breakfast Casserole with Eggs and Cheese
Ingredients
Method
- Preheat the oven. Set your oven to 400°F (200°C). If using frozen hash browns, thaw them completely and drain thoroughly to remove excess moisture.
- Prepare the ramekin. Lightly coat the inside of an 8-ounce oven-safe ramekin or small casserole dish with nonstick cooking spray.
- Form the potato base. Press the hash browns firmly into the bottom of the prepared ramekin, creating an even layer.
- Bake the potatoes. Place the ramekin on a baking sheet and bake for approximately 20 minutes, or until the potatoes begin turning lightly golden around the edges.
- Cool and reduce the oven temperature. Remove the ramekin from the oven and allow the potato base to cool for 10–12 minutes. Immediately reduce the oven temperature to 350°F (175°C).
- Sauté the vegetables. Meanwhile, place the bell pepper, sweet onion, and chopped jalapeño in a small nonstick saucepan or skillet. Cook over medium heat for approximately 5–7 minutes, stirring occasionally, until tender. Add a small amount of cooking spray if needed to prevent sticking.
- Prepare the egg mixture. In a small bowl, whisk together the lightly beaten egg and light cream or half-and-half. Add the minced garlic, salt, and black pepper. Mix until evenly combined.
- Layer the casserole. Lightly spray the top of the baked potato layer and the sides of the ramekin again. Sprinkle half of the Monterey Jack cheese over the potatoes.
- Add vegetables and eggs. Spread the sautéed vegetables over the cheese. Carefully pour the egg mixture over the vegetables, then sprinkle the remaining cheese on top.
- Bake until golden. Return the ramekin to the baking sheet and bake at 350°F (175°C) for approximately 25–35 minutes, or until the egg mixture is set, the casserole is slightly puffed, and the top is golden. Check that the center reaches 160°F (71°C).
- Allow to rest. Remove the casserole from the oven and let it rest for 5–10 minutes so the filling can firm up.
- Remove and serve. Carefully run a thin knife around the edges of the ramekin. Invert the casserole onto a serving plate, gently tap the ramekin if needed, and lift it away. Serve warm. Alternatively, enjoy directly from the ramekin.
Notes
- Hash browns: Refrigerated or completely thawed frozen hash browns work. Remove excess moisture before baking to help develop a lightly crisp potato base.
- Ramekin size: The original recipe specifies an 8-ounce oven-safe ramekin. Check that all ingredients fit without overfilling; use a larger oven-safe dish if necessary.
- Cheese: Divide the Monterey Jack cheese into two portions, placing one beneath the vegetables and the other over the egg mixture.
- Jalapeño: Use ½–1 jalapeño depending on your preferred spice level. Remove the seeds as directed.
- Cream: Either light cream or half-and-half can be used for the egg filling.
- Cooking spray: Regular or butter-flavored nonstick cooking spray works for greasing the ramekin.
- Potato cooling: Allow the partially baked potatoes to cool for 10–12 minutes before assembling the filling.
- Oven temperatures: Bake the potato base at 400°F (200°C), then reduce to 350°F (175°C) for the final bake.
- Doneness: The finished egg casserole should be set in the center and reach an internal temperature of 160°F (71°C).
- Resting: Allow 5–10 minutes before removing the casserole from the ramekin.
- Serving adjustment: The ingredient quantities describe one individual casserole. Increase proportionally for additional servings.
- Make-ahead preparation: Vegetables can be chopped and cheese shredded in advance to simplify morning preparation.
There is something particularly satisfying about having your own little breakfast casserole, with crispy potatoes around the bottom, creamy eggs in the center, and melted cheese on top.
These mini breakfast casseroles combine familiar breakfast ingredients in a single oven-baked dish. The hash brown base is baked first to develop a lightly golden texture, while the peppers, onion, and jalapeño bring freshness and a little heat to the cheesy egg filling.
Here’s what makes this recipe worth trying:
- Crispy potato base: Baking the hash browns before adding the filling helps prevent a soggy bottom.
- Rich, cheesy center: Monterey Jack melts smoothly into the egg mixture, creating a creamy, savory filling.
- Customizable spice level: Adjust the jalapeño according to how much heat you enjoy.
- Individual presentation: Small ramekins make the casseroles suitable for brunch gatherings or portioned breakfasts.
- Easy to scale: Increase the ingredients to prepare several casseroles for family breakfasts or weekend guests.
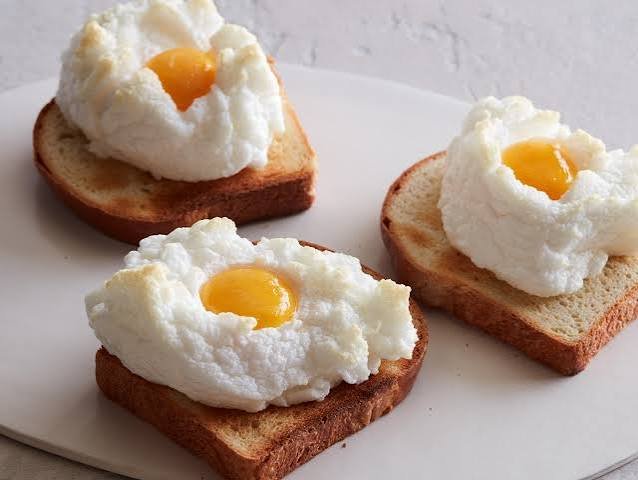
Fluffy Cloud Eggs with Parmesan, Bacon and Chives (Easy Baked Breakfast)
Ingredients
Method
- Preheat the oven. Set your oven to 450°F (230°C). Line a baking sheet with parchment paper suitable for this temperature.
- Separate the eggs. Carefully separate the egg whites from the yolks. Place all four whites in a large, clean mixing bowl and keep each yolk in its own small bowl, making sure the yolks remain intact.
- Whip the egg whites. Using an electric mixer, beat the egg whites until they form stiff peaks. The whites should be thick, glossy, and able to hold their shape.
- Fold in the ingredients. Gently fold the grated Parmesan cheese, chopped chives, and cooked crumbled bacon into the whipped egg whites. Avoid overmixing so the mixture stays light and airy.
- Shape the clouds. Divide the egg white mixture into four fluffy mounds on the prepared baking sheet. Use the back of a spoon to create a deep well in the center of each mound.
- Bake the egg whites. Place the baking sheet in the preheated oven and bake for 3 minutes, allowing the whites to begin setting and turning lightly golden.
- Add the egg yolks. Carefully remove the baking sheet from the oven. Gently slide one egg yolk into the center of each cloud. Season with black pepper.
- Finish baking. Return the baking sheet to the oven and bake for another 2–3 minutes, or until the whites are set and the yolks reach your preferred doneness. For fully cooked eggs, continue baking until both whites and yolks are firm.
- Serve immediately. Carefully lift the cloud eggs from the parchment using a thin spatula and serve while warm and fluffy.
Notes
- Egg separation: Keep the yolks intact and make sure no yolk gets into the egg whites, as fat can interfere with whipping.
- Whipping: Beat the egg whites until stiff peaks form. Properly whipped whites help the clouds maintain their airy shape.
- Cheese alternative: Pecorino Romano can replace Parmesan for a slightly sharper, saltier flavor.
- Bacon: Cook and crumble the bacon before adding it to the whipped egg whites.
- Folding: Fold the cheese, chives, and bacon gently to avoid deflating the mixture.
- Shaping: Create four mounds with deep centers to hold the egg yolks during the second baking stage.
- Baking: Bake the egg white mixture for 3 minutes before adding the yolks, then continue for approximately 2–3 minutes as originally directed.
- Yolk doneness: The original method produces softly set yolks. For food safety, cook egg dishes to 160°F (71°C), or until both the whites and yolks are firm.
- Parchment paper: Check the manufacturer’s maximum recommended temperature, as many parchment products are not rated for 450°F. Use a suitable alternative baking surface if necessary.
- Serving: The recipe yields four individual cloud eggs and is best enjoyed immediately.
Cloud eggs turn a few familiar breakfast ingredients into something that looks surprisingly elegant. Instead of cooking whole eggs in a skillet, the whites are whipped until airy, mixed with savory ingredients, and baked into fluffy mounds. The yolks are added afterward, creating a golden center surrounded by delicate, cloud-like egg whites.
The combination of Parmesan, crispy bacon, and fresh chives adds plenty of flavor without requiring a complicated preparation.
Here’s why this recipe is worth trying:
- Light, airy texture: Whipped egg whites create a fluffy base that’s completely different from ordinary fried or scrambled eggs.
- Savory, cheesy flavor: Parmesan adds a slightly salty, nutty taste that complements the bacon and chives.
- Beautiful presentation: Golden yolks nestled inside fluffy white clouds make an impressive breakfast or brunch centerpiece.
- Simple ingredients: The recipe uses eggs, cheese, bacon, herbs, and pepper.
- Quick oven preparation: The clouds bake in two short stages, making them convenient for a special breakfast without a long cooking process.
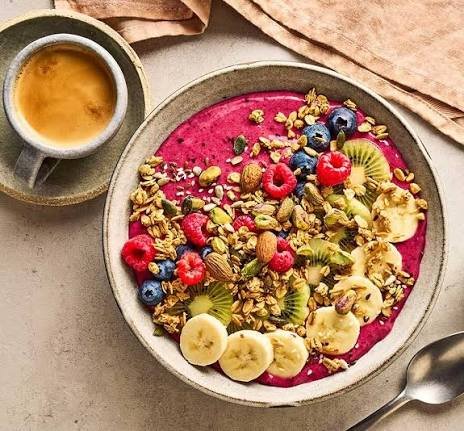
Creamy Banana Orange Breakfast Smoothie (Easy 2-Minute Recipe)
Ingredients
Method
- Prepare the ingredients. Gather the milk, orange juice, frozen bananas, cottage cheese, and artificial sweetener. If the bananas are frozen whole, break or cut them into smaller pieces if necessary.
- Add the liquids. Pour the low-fat milk and orange juice into a blender.
- Add the remaining ingredients. Add the frozen bananas, nonfat cottage cheese, and artificial sweetener.
- Blend until smooth. Secure the blender lid and blend until the mixture becomes thick, creamy, and completely smooth, with no noticeable banana pieces or cottage cheese curds.
- Check the consistency. If the smoothie is too thick to blend comfortably, add a small splash of milk and blend again.
- Serve immediately. Divide the smoothie evenly between two tall glasses and enjoy while cold and cre
Notes
- Milk: The recipe uses 2% low-fat milk for a creamy texture without using whole milk.
- Cottage cheese: Nonfat cottage cheese contributes protein and creaminess. Blend thoroughly to eliminate noticeable curds.
- Frozen bananas: Frozen bananas help create a thick, chilled smoothie without needing additional ice.
- Orange juice: Adds citrus flavor and balances the creaminess of the milk and cottage cheese.
- Sweetener: The recipe includes 1 teaspoon of artificial sweetener. Sweetness varies by product, so adjust according to taste and the manufacturer’s recommendations.
- Blending: Puree all ingredients until completely smooth.
- Consistency: Add a little extra milk if the frozen bananas make the mixture difficult to blend.
- Serving: Divide the finished smoothie between two tall glasses.
- Best served fresh: Enjoy immediately for the smoothest texture and freshest flavor.
A quick breakfast doesn’t have to be complicated. This Banana Orange Breakfast Smoothie combines the natural sweetness of frozen bananas with bright orange juice, creamy milk, and cottage cheese for a refreshing drink that comes together in minutes.
The cottage cheese is especially useful here. Once blended, it creates a smooth texture while adding protein, without giving the smoothie a noticeable chunky consistency.
Here’s what makes this recipe worth trying:
- Ready in minutes: Everything goes into one blender, making preparation quick and cleanup simple.
- Naturally fruity flavor: Sweet bananas and tangy orange juice create a refreshing combination.
- Creamy texture: Frozen bananas and blended cottage cheese give the smoothie a thick, smooth consistency.
- Protein-containing ingredients: Milk and cottage cheese contribute protein, making this more substantial than a basic fruit-and-juice smoothie.
- Convenient frozen fruit: Keeping bananas in the freezer makes it easy to prepare a cold smoothie whenever needed.
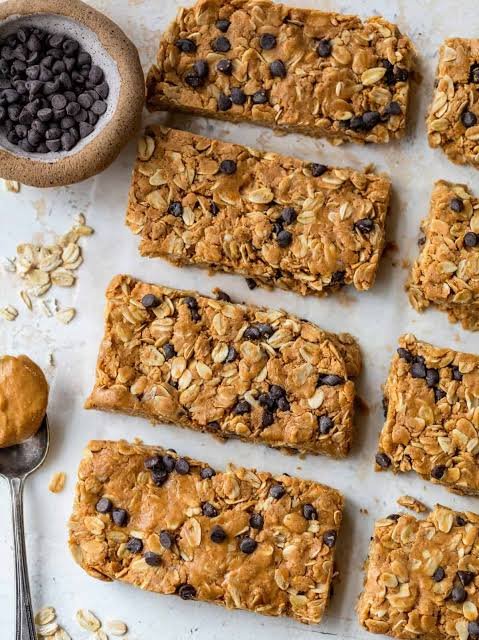
Easy No-Bake Peanut Butter Protein Bars with Oats and Honey
Ingredients
Method
- Prepare the pan. Line a 9 × 13-inch baking pan with parchment paper, leaving a little overhang to make removing the bars easier.
- Warm the peanut butter mixture. Add the peanut butter, honey, and skim milk to a medium saucepan. Place over low heat and stir until the mixture softens and becomes easier to combine.
- Add the protein powder. Remove the saucepan from the heat or keep it on very low heat. Gradually stir in the whey protein powder until evenly incorporated.
- Mix in the oats. Add the dry rolled oats and stir thoroughly until they are coated with the peanut butter mixture.
- Adjust the consistency. If the mixture becomes too thick or difficult to stir, add a small splash of extra milk. It should be thick and cohesive enough to press into a pan.
- Press into the pan. Transfer the mixture to the prepared baking pan. Press firmly into an even layer using a spatula or the back of a spoon.
- Allow to cool. Let the mixture cool and firm up. Refrigerate if necessary to help the bars hold their shape.
- Cut into bars. Once firm enough to slice, remove from the pan and cut into 16 equal-sized bars.
- Wrap and store. Wrap the bars individually in food-safe wrap or foil and refrigerate in an airtight container.
Notes
- Peanut butter: Natural-style or low-fat peanut butter can be used. Their consistency and moisture content may vary.
- Protein powder: Vanilla whey protein powder provides a mild sweetness, while chocolate whey protein creates a chocolate-peanut-butter flavor.
- Protein powder quantity: Start with 1¼ cups and increase toward 1½ cups if the mixture can accommodate more without becoming dry.
- Oats: Use old-fashioned rolled oats rather than quick-cooking oats for the intended chewy texture.
- Heating: Warm the peanut butter, honey, and milk gently. The mixture should only be warmed enough to combine the ingredients, not cooked.
- Consistency: Add extra milk gradually if the mixture becomes too thick to stir or press into the pan.
- Pan size: Use a 9 × 13-inch baking pan and press the mixture evenly before cooling.
- Cutting: Allow the mixture to firm up before dividing it into 16 bars.
- Wrapping: Individual wrapping makes the bars convenient to portion and transport.
- Storage: Although the original preparation suggests that refrigeration is unnecessary, these bars contain milk and hydrated oats and have no validated shelf-stable preservation process. Store them in the refrigerator rather than at room temperature.
- Food safety: Use a whey protein powder intended for consumption without cooking, and follow its storage instructions.
Homemade protein bars are a convenient way to prepare satisfying snacks without relying on individually packaged store-bought options. These Peanut Butter Protein Bars combine creamy peanut butter, hearty oats, and whey protein powder into a chewy, nutty bar with just a touch of honey.
The mixture only needs gentle warming to bring the ingredients together, so there is no baking involved.
Here’s what makes this recipe worth trying:
- Protein-containing ingredients: Whey protein powder and peanut butter contribute protein, making these bars a practical snack after exercise or between meals.
- Rich peanut butter flavor: Peanut butter provides a creamy, nutty base that pairs naturally with oats and honey.
- Easy no-bake preparation: The mixture is gently warmed, pressed into a pan, and allowed to firm up.
- Soft, chewy texture: Rolled oats add substance and a pleasant bite without turning the bars into a crunchy granola snack.
- Convenient individual portions: Cutting the mixture into 16 bars makes portioning simple for busy days.

Easy Southern Breakfast Bake with Sausage, Cheesy Grits and Eggs
Ingredients
Method
- Preheat the oven. Set the oven to 325°F (163°C). Lightly grease a casserole dish and set aside.
- Brown the sausage. Place the pork sausage in a heavy skillet over medium heat. Cook, breaking it into small crumbles with a spatula, until browned and fully cooked. Drain the excess fat and set aside.
- Prepare the grits. Bring 2¼ cups of water and 1 teaspoon salt to a boil in a saucepan. Gradually stir in the quick-cooking grits.
- Cook until thickened. Cover the saucepan, reduce the heat to low, and cook for approximately 5 minutes, stirring occasionally, until the grits become thick and tender.
- Start the cheese sauce. In a separate medium saucepan, melt the butter or margarine over medium-low heat. Stir in the flour and black pepper until combined.
- Add the milk. Gradually pour in the milk while stirring continuously. Continue cooking until the sauce becomes smooth and thick enough to lightly coat a spoon.
- Melt the cheese. Add the shredded cheddar cheese and stir until melted and fully incorporated into the sauce.
- Combine the sausage and grits. Add the cooked sausage and half of the prepared cheese sauce to the grits. Stir until everything is evenly distributed.
- Transfer to the casserole dish. Spoon the cheesy sausage and grits mixture into the prepared baking dish and spread it into an even layer.
- Add the eggs. Use the back of a large spoon to create four indentations in the grits. Carefully crack one egg into each indentation.
- Bake the casserole. Place the dish in the preheated oven and bake for approximately 15–18 minutes, or until the eggs reach your preferred doneness. For fully cooked eggs, continue baking until the yolks and whites are firm and the egg portions reach 160°F (71°C).
- Warm the remaining sauce. While the casserole finishes baking, gently reheat the reserved cheese sauce over low heat, stirring until smooth.
- Serve warm. Divide the breakfast bake into four portions and serve with the warm cheese sauce spooned over or alongside each serving.
Notes
- Pork sausage: Brown the sausage thoroughly and drain excess grease before combining it with the grits.
- Grits: Use quick-cooking grits rather than traditional stone-ground grits, which require a longer cooking time.
- Butter alternative: Margarine can replace butter in the same quantity.
- Cheese sauce: Divide the prepared cheddar sauce into two portions. Mix half into the grits and reserve the other half for serving.
- Eggs: Make four deep indentations in the grits mixture to help hold the eggs in place.
- Baking temperature: Bake at 325°F (163°C).
- Baking time: The original recipe specifies 15–18 minutes for the final baking stage. Firmer yolks may require additional time.
- Egg safety: Cook egg dishes to 160°F (71°C) for a fully cooked result.
- Cheese sauce consistency: If the reserved sauce thickens while standing, gently reheat it with a small splash of milk.
- Serving: Divide into four portions, with one baked egg per serving.
- Preparation time: The stated total time is 35 minutes. Actual time may vary depending on sausage browning, sauce preparation, and preferred egg doneness.
A good Southern breakfast is all about comforting flavors, and this easy breakfast bake brings several favorites together in one dish. Creamy grits, savory pork sausage, melted cheddar cheese, and baked eggs create a hearty meal that’s especially appealing on slower mornings.
What makes this recipe different from a typical breakfast casserole is the grits base. Instead of bread or hash browns, tender grits hold the sausage and cheese sauce, creating a soft, creamy foundation for the eggs.
Here’s why this recipe is worth trying:
- Classic Southern comfort food: Sausage, grits, cheddar cheese, and eggs bring familiar breakfast flavors together.
- Rich, creamy texture: A homemade cheese sauce adds smoothness to the grits and makes each serving extra comforting.
- Everything in one casserole: The eggs bake directly over the grits, creating a convenient breakfast dish.
- Extra cheese sauce for serving: Reserving part of the sauce keeps the finished casserole creamy and flavorful.
- Perfect for family breakfast: The casserole divides naturally into four portions, each with its own baked egg.
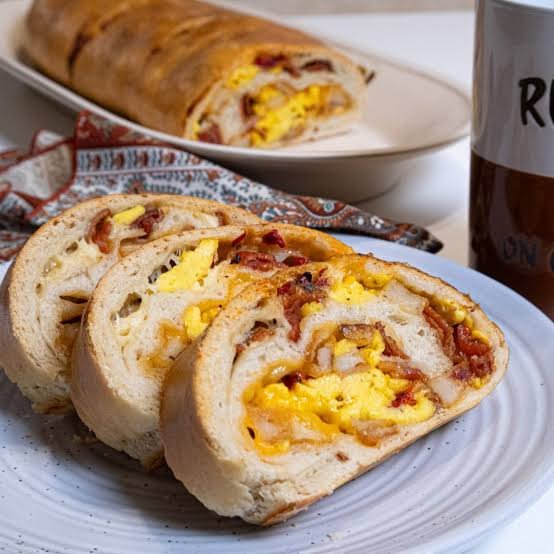
Cheesy Bacon and Egg Breakfast Stromboli with Flaky Puff Pastry
Ingredients
Method
- Preheat the oven. Position the oven rack in the center and preheat to 400°F (200°C). Line a baking sheet with parchment paper suitable for this temperature.
- Cook the bacon. Cook the bacon in a skillet over medium heat until browned and crispy. Transfer to a paper-towel-lined plate to remove excess grease.
- Prepare the scrambled eggs. Scramble 5 large eggs in a nonstick skillet until just set. Remove from the heat and allow them to cool slightly before assembling the Stromboli.
- Roll out the pastry. Lightly flour a clean work surface. Unfold the thawed puff pastry and gently roll it into a 14 × 14-inch square. Pinch any seams created by the folds to seal them together.
- Arrange the bacon. Place 4 bacon slices in a horizontal row near the upper portion of the pastry and another 4 slices in a parallel row below, leaving approximately a 1-inch border around the edges.
- Add the eggs and cheese. Spread the scrambled eggs between the bacon rows, keeping the filling away from the pastry edges. Sprinkle the shredded sharp cheddar cheese evenly over the filling.
- Prepare the egg wash. In a small bowl, whisk the remaining egg with 1 teaspoon water. Lightly brush the mixture around the pastry perimeter.
- Roll the Stromboli. Starting from one side, carefully roll the pastry over the filling to create a compact log. Pinch the seam closed and tuck the ends underneath to seal.
- Prepare for baking. Transfer the Stromboli to the prepared baking sheet, seam-side down. Brush the entire surface with the remaining egg wash and lightly season with salt and pepper.
- Bake until golden. Place in the preheated oven and bake for 25–30 minutes, or until the puff pastry is deeply golden, crisp, and cooked through. The egg filling should reach 165°F (74°C).
- Rest before slicing. Remove from the oven and allow the Stromboli to rest for at least 5 minutes.
- Slice and serve. Cut into six portions using a sharp serrated knife and serve warm.
Notes
- Puff pastry: Thaw according to package instructions before rolling into a 14 × 14-inch square. Keep the dough cool enough to handle without becoming sticky.
- Bacon: Cook the bacon before assembling and drain excess grease on paper towels.
- Eggs: Five eggs are used for the scrambled filling, while the sixth egg is reserved for the egg wash.
- Cheese: Sharp cheddar provides a rich, savory flavor that complements the bacon and eggs.
- Pastry border: Leave approximately 1 inch around the edges to make sealing easier and prevent the filling from escaping.
- Egg wash: Mix the beaten egg with water and brush around the pastry edges and over the finished roll.
- Sealing: Pinch the seam closed, tuck the ends underneath, and bake seam-side down.
- Baking: Bake at 400°F (200°C) for 25–30 minutes, until the crust is deep golden brown.
- Resting: Allow at least 5 minutes before slicing to help the filling settle.
- Serving: Serve hot or warm, cut into six portions.
- Food safety: Fully cook the bacon and scrambled eggs before assembly. The assembled breakfast pastry should be heated thoroughly, with the center reaching 165°F (74°C).
- Timing: The stated total time is 45 minutes. Actual preparation may vary depending on pastry thawing and how quickly the bacon and eggs are cooked.
Bacon, eggs, and cheddar cheese are a classic breakfast combination, but wrapping them in buttery puff pastry makes them feel a little more special.
This breakfast Stromboli takes inspiration from the familiar rolled Italian-style dish and gives it a savory breakfast twist. Instead of pizza dough and traditional fillings, it uses flaky puff pastry packed with scrambled eggs, crispy bacon, and sharp cheddar.
As the pastry bakes, the outside becomes golden and crisp while the cheese melts around the soft egg filling.
Here’s what makes this recipe worth trying:
- Flaky, golden pastry: Puff pastry creates a buttery, crisp exterior that contrasts beautifully with the soft filling.
- Classic breakfast flavors: Smoky bacon, scrambled eggs, and melted cheddar work together in every slice.
- Perfect for sharing: The rolled pastry can be sliced into individual portions for family breakfasts or brunch gatherings.
- Simple store-bought pastry: Using a ready-made puff pastry sheet saves time without sacrificing the impressive presentation.
- Easy to customize: Different cheeses, vegetables, and breakfast meats can be used to create variations.

Crispy Baked Breakfast Egg Rolls with Spinach, Sausage and Cheese
Ingredients
Method
- Preheat the oven. Set the oven to 425°F (220°C). Lightly coat a baking dish or baking sheet with nonstick cooking spray.
- Prepare the ingredients. Thaw the frozen spinach and squeeze out as much excess moisture as possible. Make sure your chosen sausage or bacon is fully cooked and chopped into small pieces.
- Whisk the eggs. In a medium bowl, whisk together the liquid egg whites or whole eggs, milk, garlic pepper seasoning, and cayenne pepper.
- Scramble the eggs. Lightly coat a large skillet with cooking spray and heat over medium-high heat. Add the egg mixture and cook, stirring gently, until the eggs are nearly set.
- Add the spinach and meat. Stir the drained spinach and cooked sausage or bacon into the eggs. Mix until evenly combined and continue cooking until the eggs are set. Remove from the heat.
- Divide the filling. Place an egg roll wrapper on a clean work surface. Spoon one-eighth of the egg mixture into the center.
- Add the cheeses. If using Monterey Jack, sprinkle approximately 2 tablespoons over the filling. Add ½ tablespoon grated Asiago cheese.
- Roll the wrapper. Lightly moisten the wrapper edges with water. Fold in the sides, then roll tightly into an egg roll shape. Press the edges to seal.
- Repeat. Assemble the remaining seven egg rolls, dividing the filling and cheese evenly. Arrange the rolls seam-side down on the prepared baking dish or sheet.
- Spray and bake. Lightly spray the tops of the egg rolls with cooking spray. Bake for 8 minutes.
- Flip and finish baking. Carefully turn each egg roll over and bake for another 8 minutes, or until the wrappers are starting to crisp and turn golden brown.
- Cool and serve. Remove from the oven and allow the egg rolls to cool for approximately 1 minute before serving warm.
Notes
- Egg options: Use an 8-ounce carton of liquid egg whites or 6 whole eggs. The flavor and richness will vary depending on your choice.
- Milk: Nonfat milk or regular milk works in the filling.
- Meat alternatives: Turkey sausage, regular sausage, turkey bacon, regular bacon, veggie bacon, or veggie sausage can be used. Cook the chosen protein fully before adding it.
- Spinach: Thaw and squeeze the frozen spinach thoroughly. Excess moisture can make the wrappers soggy.
- Monterey Jack: Reduced-fat or regular Monterey Jack is optional. If included, use approximately 2 tablespoons per roll.
- Asiago: Divide the 4 tablespoons evenly between the eight egg rolls.
- Egg roll wrappers: Look for egg roll wrappers in the refrigerated produce section of many grocery stores.
- Rolling: Moisten the edges and seal the wrappers securely to keep the filling inside.
- Baking: Bake at 425°F (220°C) for approximately 16 minutes, flipping halfway through, until crisp and golden.
- Make-ahead: The finished egg rolls can be prepared in advance and frozen.
- Freezing: Cool completely, wrap individually, and store in freezer-safe packaging.
- Reheating: Thaw overnight in the refrigerator or use the microwave defrost setting, then reheat in a toaster oven until hot throughout.
- Food safety: Reheat leftovers to an internal temperature of 165°F (74°C).
Breakfast doesn’t always have to be served on a plate. These On-The-Go Breakfast Egg Rolls turn familiar morning ingredients into crispy, handheld wraps that are easy to prepare ahead of time.
Inside each golden wrapper, you’ll find scrambled eggs, tender spinach, savory sausage, and a combination of Monterey Jack and Asiago cheese. The filling is satisfying without being complicated, while oven baking creates a lightly crisp exterior without deep-frying.
They’re particularly useful for mornings when sitting down to a full breakfast isn’t practical.
Here’s what makes this recipe worth trying:
- Convenient handheld breakfast: The egg roll wrappers keep the savory filling together, making individual portions easy to serve.
- Baked instead of fried: A light coating of cooking spray helps the wrappers become golden without deep-frying.
- Flexible ingredients: Choose egg whites or whole eggs, along with turkey sausage, bacon, or a vegetarian alternative.
- Includes spinach: Chopped spinach adds vegetables, color, and a mild earthy flavor.
- Freezer-friendly: Prepare a batch in advance and reheat individual rolls when needed.

Creamy Four Cheese Egg Casserole (Easy Cheesy Breakfast Bake)
Ingredients
Method
- Preheat the oven. Set your oven to 325°F (163°C). Lightly grease a 9 × 13-inch baking dish with butter or nonstick cooking spray.
- Beat the eggs. Crack the eggs into a large mixing bowl. Add the milk and sugar, then whisk until thoroughly combined.
- Add the grated cheeses. Stir in the shredded Monterey Jack and cheddar cheese, distributing them evenly through the egg mixture.
- Mix in the soft cheeses. Add the room-temperature cream cheese cubes and small-curd cottage cheese. Stir until well combined. Small pieces of cheese may remain.
- Add the butter and basil. Mix in the softened butter and chopped fresh basil until incorporated.
- Add the dry ingredients. Sprinkle in the flour and baking powder. Stir gently until the ingredients are combined and no large pockets of dry flour remain.
- Transfer to the baking dish. Pour the mixture into the prepared 9 × 13-inch baking dish and spread it evenly.
- Bake the casserole. Place in the preheated oven and bake for approximately 50 minutes, or until the casserole is set, lightly golden, and a knife inserted into the center comes out clean. The center should reach 160°F (71°C).
- Rest briefly. Remove from the oven and allow the casserole to rest for a few minutes so it firms up slightly before slicing.
- Slice and serve. Cut into portions and serve warm.
Notes
- Four cheeses: Monterey Jack, cheddar, cream cheese, and cottage cheese create a rich, moist casserole with a custard-like texture.
- Monterey Jack and cheddar: Grate both cheeses before adding them to the egg mixture.
- Cream cheese: Use room-temperature cream cheese cut into small cubes to make mixing easier.
- Cottage cheese: Small-curd cottage cheese is specified in the original recipe and contributes moisture and creaminess.
- Butter: Allow the butter to soften to room temperature before mixing.
- Fresh basil: The recipe uses fresh chopped basil, but another fresh herb can be substituted.
- Ham variation: Add cooked, chopped ham for an additional savory flavor. Avoid adding too much, as it may affect the casserole’s texture.
- Flour and baking powder: These ingredients help give the rich egg mixture structure as it bakes.
- Baking dish: Use a lightly greased 9 × 13-inch baking dish.
- Baking temperature: Bake at 325°F (163°C).
- Doneness: The casserole is ready when the center is set and a knife inserted into the middle comes out clean. Confirm the center reaches 160°F (71°C).
- Texture: Expect a soft, creamy, custard-like interior rather than a firm, bread-based breakfast casserole.
- Serving: Allow the casserole to rest briefly before slicing for cleaner portions.
A good breakfast casserole should be satisfying without being complicated, and this Four Cheese Egg Casserole delivers exactly that. With seven eggs, four different cheeses, softened butter, and a little fresh basil, it bakes into a rich, tender dish that’s especially well suited to a leisurely breakfast or brunch.
Unlike breakfast casseroles made with bread, potatoes, or sausage, this version focuses on the eggs and cheese. The cottage cheese helps create its soft, moist texture, while cheddar and Monterey Jack add plenty of melted cheese flavor.
Here are a few reasons this recipe deserves a place on your breakfast table:
- Four delicious cheeses: Cheddar, Monterey Jack, cream cheese, and cottage cheese work together to create layers of rich, savory flavor.
- Creamy, custardy texture: The combination of eggs, milk, and soft cheeses produces a tender casserole that stays moist.
- Simple mixing method: No complicated layers or stovetop cooking are required. Just combine the ingredients and bake.
- Perfect for sharing: A 9 × 13-inch baking dish is convenient for family breakfasts, brunches, and holiday gatherings.
- Easy to customize: Fresh herbs or chopped ham can be added to create different flavor combinations.
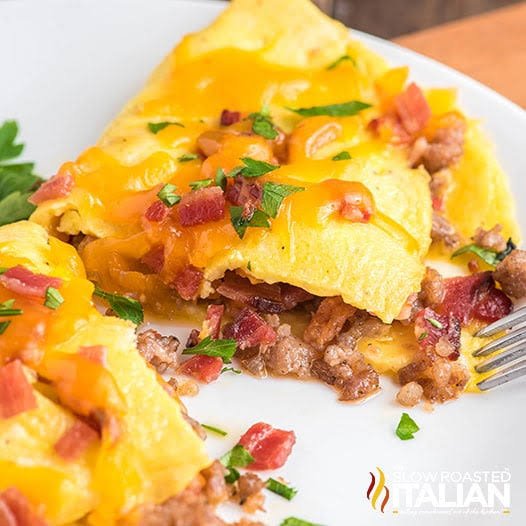
Meat Lover’s Omelet with Bacon, Sausage, Ham and Cheddar Cheese
Ingredients
Method
- Prepare the filling. Make sure the bacon and sausage are fully cooked and crumbled, and the ham is cooked and chopped. Shred the cheddar cheese if needed.
- Whisk the eggs. Crack the eggs into a small mixing bowl. Add the freshly ground black pepper and whisk until the yolks and whites are evenly combined.
- Heat the skillet. Place a 10-inch nonstick skillet over medium heat. Add the butter and swirl the pan until the bottom is evenly coated.
- Add the eggs. Pour the beaten egg mixture into the skillet, tilting the pan slightly to spread it into an even layer.
- Cook the omelet. As the edges begin to set, gently lift them with a spatula and tilt the skillet so the uncooked egg flows underneath.
- Continue cooking. Cook for approximately 3–4 minutes, or until the egg mixture is mostly set and the omelet can be folded without breaking.
- Add the cheese and meats. Sprinkle the shredded cheddar, crumbled bacon, cooked sausage, and chopped ham evenly over one half of the omelet.
- Fold the omelet. Carefully lift the unfilled half with a spatula and fold it over the filling.
- Melt the cheese. Cook for approximately 1 additional minute, or until the cheese is melted and the eggs are fully cooked. The center should reach 160°F (71°C).
- Serve immediately. Carefully slide the omelet onto a serving plate and enjoy while hot.
Notes
- Meat preparation: The bacon and sausage must be fully cooked before adding them to the omelet. Use cooked, chopped ham.
- Cheese: Sharp cheddar adds a rich, tangy flavor and melts beautifully into the warm filling.
- Skillet: A 10-inch nonstick skillet works well for spreading the four-egg mixture evenly.
- Butter: Swirl the melted butter around the skillet to help prevent sticking.
- Egg cooking: Gently lift the edges and tilt the pan so uncooked egg flows underneath.
- Filling: Spread the bacon, sausage, ham, and cheese across one half of the omelet for easier folding.
- Heat: Use medium heat to avoid browning the outside before the center is cooked.
- Seasoning: Bacon, ham, sausage, and cheddar already contribute salt, so additional salt may not be necessary.
- Doneness: Cook until the eggs are set and reach an internal temperature of 160°F (71°C).
- Serving: Enjoy immediately while the eggs are tender and the cheese is melted.
- Yield: The original recipe does not specify a serving count. It makes one large four-egg omelet that can be shared if desired.