

Easy Slow Cooker Chicken and Dumplings with Fluffy Biscuit Dumplings
Ingredients
Method
- Prepare the ingredients. Gather the chicken breasts, butter, condensed cream of chicken soup, diced onion, refrigerated biscuit dough, and water.
- Fill the slow cooker. Place the chicken breasts in the slow cooker. Add the condensed cream of chicken soup, finely diced onion, and butter.
- Add the liquid. Pour in approximately 2 cups of water, or enough to cover the chicken. Stir gently to combine the soup and water around the chicken.
- Slow cook the chicken. Cover with the lid and cook on High for 5 to 6 hours, until the chicken is fully cooked and tender. The chicken should reach an internal temperature of 165°F (74°C).
- Prepare the dumplings. Approximately 30 minutes before serving, open the refrigerated biscuit dough and tear each biscuit into smaller, roughly equal-sized pieces.
- Add the biscuit dough. Carefully place the dough pieces into the hot chicken mixture. Gently press them into the liquid so they can cook evenly.
- Finish cooking. Replace the lid and continue cooking until the dumplings are cooked through and no longer raw or sticky in the center. Cooking time may vary depending on the size of the pieces and the slow cooker.
- Serve warm. Check that the dumplings are fully cooked, then ladle the chicken, creamy broth, and dumplings into bowls. Serve immediately.
Notes
- For richer flavor: Replace the water with chicken stock to create a more savory broth.
- Extra dumplings: Additional refrigerated biscuit dough can be used, but avoid overcrowding the slow cooker. Larger quantities may require additional cooking time.
- Dumpling size: Tear the biscuit dough into smaller, similar-sized pieces to help the centers cook evenly.
- Refrigeration: Allow leftovers to cool promptly and transfer them to an airtight container. Refrigerate at 40°F (4°C) or below and use within 3 to 4 days.
- Reheating: Warm leftovers in the microwave or on the stovetop until heated throughout to 165°F (74°C). Add a little water or broth if the mixture becomes too thick.
- Freezing: For better texture, separate the dumplings from the chicken and soup before freezing. Pack them in separate freezer-safe containers or bags.
- Reheating from frozen: Thaw the stored portions safely in the refrigerator. Bring the chicken and soup to a simmer, add the thawed dumplings, and heat until everything is thoroughly hot. Allow approximately 10 to 15 minutes, adjusting as needed.
There is something especially comforting about a bowl of creamy chicken and dumplings when the weather turns cold. This slow cooker version keeps things simple by using refrigerated biscuit dough instead of homemade dumplings, making it an approachable dinner for busy evenings.
- Only six ingredients: Chicken, condensed soup, onion, butter, biscuit dough, and water create a satisfying meal without a long shopping list.
- Tender, flavorful chicken: Slow cooking gives the chicken time to become tender while the onion and soup develop a savory base.
- Soft, fluffy dumplings: Refrigerated biscuit dough cooks in the creamy broth, creating pillowy dumplings that soak up the chicken flavor.
- Minimal preparation: Most of the cooking happens in the slow cooker, with the dumplings added near the end.
- A complete comfort meal: The combination of chicken, dumplings, and creamy sauce is hearty enough to serve as the main dish.

Easy Mississippi Chicken Recipe (Juicy, Tangy & Tender)
Ingredients
Method
- Prepare the ingredients. Gather the chicken breasts, ranch dressing mix, sliced pepperoncini peppers, reserved pepper juice, butter, and water.
- Preheat the oven. Set your oven to 350°F (175°C).
- Season the chicken. Sprinkle the dry ranch dressing mix evenly over the chicken breasts, coating all sides. Arrange the seasoned chicken in the bottom of a medium Dutch oven.
- Add the pepperoncini. Scatter the sliced, drained pepperoncini peppers over the chicken. Pour in 1/4 cup of reserved pepperoncini juice to add a tangy flavor.
- Add butter and water. Place the sliced butter over the chicken and pour 1/2 cup of water into the Dutch oven.
- Cover and bake. Secure the Dutch oven with a tight-fitting lid. Bake for 1 hour to 1 hour 15 minutes, or until the chicken is fork-tender. Check the thickest part with an instant-read thermometer to ensure it reaches 165°F (74°C).
- Allow the chicken to rest. Remove the Dutch oven from the oven and let the chicken stand for 5 minutes.
- Shred the chicken. Use two forks to pull the chicken into tender, bite-sized shreds. Gently mix the shredded chicken with the buttery ranch and pepperoncini cooking juices.
- Serve warm. Spoon the juicy Mississippi chicken over mashed potatoes or rice, or serve it inside sandwich buns with some of the flavorful cooking liquid.
Notes
- Season the chicken breasts evenly with the dry ranch dressing mix.
- Place the seasoned chicken in the bottom of a 6-quart slow cooker.
- Add the sliced pepperoncini peppers and 1/4 cup reserved pepperoncini juice.
- Arrange the sliced butter over the chicken and pour in 1/2 cup water.
- Cover and cook on Low for approximately 6 hours or High for approximately 4 hours, until the chicken is fork-tender and reaches 165°F (74°C).
- Let the chicken stand for 5 minutes, then shred it using two forks.
- Mix the shredded meat with the cooking juices before serving.
Mississippi chicken is the kind of dinner that delivers plenty of flavor without requiring much preparation. Ranch seasoning gives the chicken a savory, herby taste, while pepperoncini peppers bring a pleasant tanginess that cuts through the richness of the butter.
The chicken cooks covered in a Dutch oven, allowing it to become tender while staying surrounded by flavorful cooking juices.
Here’s what makes this recipe worth adding to your dinner rotation:
- Minimal hands-on work: A few minutes of preparation is all you need before the chicken goes into the oven.
- Bold, balanced flavor: Ranch seasoning, buttery juices, and tangy pepperoncini create a savory sauce without complicated ingredients.
- Juicy shredded texture: The chicken becomes tender enough to pull apart with forks and absorbs the flavorful cooking liquid.
- Two cooking methods: Make it in a Dutch oven or use a slow cooker for a convenient hands-off option.
- Versatile leftovers: The shredded chicken works beautifully in sandwiches, rice bowls, and comforting mashed potato dinners.

Easy Southern Fried Apples with Butter and Cinnamon
Ingredients
Method
- Prepare the ingredients. Gather the butter, white sugar, ground cinnamon, and Granny Smith apples. Peel, core, and slice the apples into evenly sized pieces so they cook at a similar rate.
- Melt the butter. Place a large skillet over medium heat. Add the butter and allow it to melt completely, stirring occasionally to prevent it from browning too quickly.
- Add the sugar and cinnamon. Stir the white sugar and ground cinnamon into the melted butter. Continue stirring until the sugar dissolves and the ingredients form a smooth, fragrant, cinnamon-butter mixture.
- Add the apple slices. Carefully place the prepared apples into the skillet. Gently stir to coat the slices evenly with the buttery cinnamon mixture.
- Cook until tender. Continue cooking over medium heat for 5 to 8 minutes, stirring occasionally, until the apples soften and become coated in the sweet cinnamon sauce.
- Check the texture. The apples should be tender but still hold their shape. If you prefer softer apples, cook slightly longer while keeping an eye on the sauce to prevent burning.
- Serve warm. Remove the skillet from the heat and serve the fried apples warm with some of the cinnamon-butter sauce spooned over the top.
Notes
- Adjust the cinnamon: The recipe uses 2 tablespoons of ground cinnamon, which creates a strong cinnamon flavor. Reduce the amount if you prefer a milder taste.
- Apple preparation: Peel, core, and slice the apples before cooking. Similar-sized slices help the apples soften evenly.
- Cooking time: Cook the apples for approximately 5 to 8 minutes, or until they reach your preferred tenderness.
- Apple variety: Granny Smith apples provide a pleasant tartness that balances the sweet buttery sauce.
- Serving suggestions: Enjoy the fried apples alongside breakfast dishes, spoon them over pancakes or waffles, or serve them as a warm dessert topping.
- Texture tip: Avoid cooking the apples for too long if you want them to remain tender without becoming mushy.
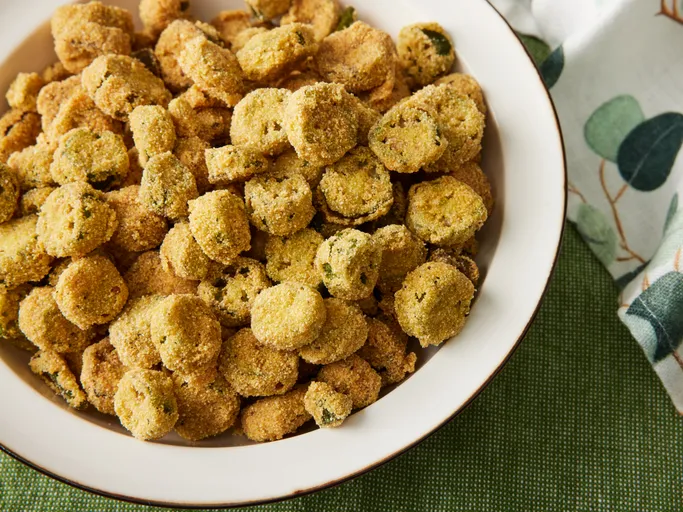
Crispy Southern Fried Okra with Golden Cornmeal Coating
Ingredients
Method
- Prepare the okra. Rinse the fresh okra pods and dry them thoroughly. Trim the stem ends and slice the pods into approximately ¼-inch pieces.
- Soak in beaten egg. Place the sliced okra in a small bowl with the beaten egg. Toss gently to coat and let soak for 5 to 10 minutes. This helps the cornmeal coating stick to the okra.
- Prepare the cornmeal coating. In a medium bowl, combine the cornmeal, salt, and ground black pepper. Stir until the seasonings are evenly distributed.
- Heat the oil. Pour the vegetable oil into a large skillet and heat over medium-high heat until hot. The oil should be hot enough for the coated okra to sizzle when added.
- Coat the okra. Remove the okra pieces from the beaten egg, allowing excess egg to drip off. Dredge them in the seasoned cornmeal mixture, turning gently until evenly coated.
- Fry until golden. Carefully add the coated okra to the hot oil. Stir continuously to help the pieces cook evenly. When the coating begins to brown, reduce the heat to medium.
- Finish cooking. Continue frying until the okra develops a golden-brown, crispy exterior. Adjust the heat as necessary to prevent the cornmeal from burning.
- Drain excess oil. Remove the fried okra from the skillet using a slotted spoon and transfer it to a plate lined with paper towels.
- Serve immediately. Enjoy the fried okra while hot and crispy, either on its own or with your favorite dipping sauce.
Notes
- Optional spice: Add a pinch of ground cayenne pepper to the cornmeal mixture for a little extra heat.
- Choosing fresh okra: Look for smooth, bright green pods that feel firm but not hard. Smaller, tender pods generally produce the best texture.
- Cornmeal coating: Make sure the okra is evenly coated with beaten egg before dredging it in the seasoned cornmeal.
- Frying tip: Reduce the heat to medium once the okra begins to brown to prevent the coating from becoming too dark.
- Serving suggestions: Serve as a snack or appetizer with ranch dressing, or enjoy it alongside Southern fried chicken.
- Refrigeration: Store leftover fried okra in an airtight container in the refrigerator for up to 3 to 4 days. Reheat thoroughly before serving.
- Reheating: For the crispiest results, reheat fried okra in the oven until hot and the coating becomes crisp again.
- Freezing before frying: After soaking the okra in egg and coating it with cornmeal, arrange the pieces in a single layer on a baking sheet. Freeze until solid, then transfer to a zip-top freezer bag. Wrap the bag in aluminum foil for additional protection against freezer burn.
- Cooking from frozen: Fry the frozen, coated okra directly from the freezer without thawing. Add carefully to the hot oil in small batches, allowing extra time as needed until thoroughly cooked and golden.
Fresh okra is a wonderful summer vegetable, especially when it’s coated in seasoned cornmeal and fried until golden. This Southern-style preparation gives each bite a crunchy exterior while keeping the inside tender.
One of the best things about this recipe is its simplicity. You don’t need complicated seasonings or a thick batter to make delicious fried okra. Just a few everyday ingredients and a hot skillet are enough to create a classic Southern favorite.
Here’s what makes this recipe worth trying:
- Crunchy cornmeal coating: The cornmeal creates a lightly crisp, golden exterior without a heavy batter.
- Simple pantry ingredients: Aside from fresh okra, the recipe uses basic ingredients you may already have.
- Great use for seasonal okra: It’s especially convenient during summer when fresh okra is widely available.
- Quick skillet cooking: The okra fries in a skillet, so there’s no need for a deep fryer.
- Perfect for snacking or sharing: Serve it as an appetizer, a crunchy snack, or a flavorful side dish with a Southern-style meal.
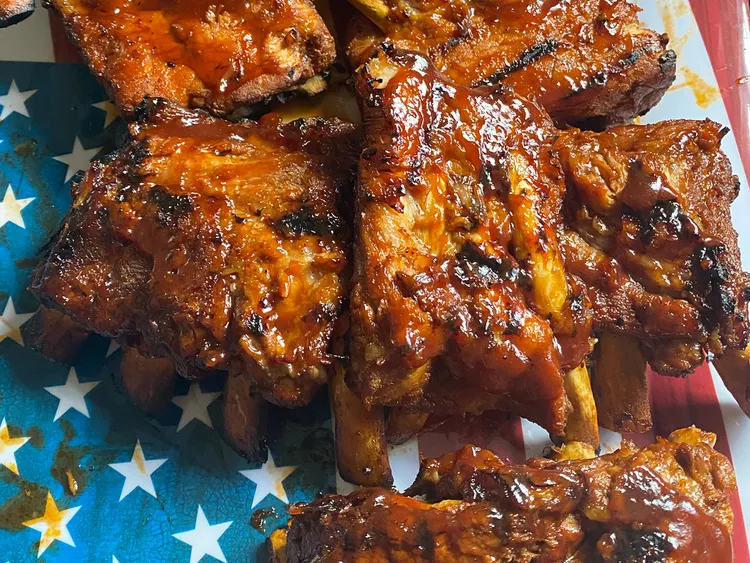
Easy BBQ Country Ribs Recipe (Tender, Juicy & Grilled)
Ingredients
Method
- Prepare the ingredients. Gather the pork spareribs, barbeque sauce, onion, salt, and ground black pepper. Cut the onion into quarters.
- Combine the ingredients. Place the pork spareribs in a large stockpot. Add both bottles of barbeque sauce, the quartered onion, salt, and black pepper.
- Add water. Pour enough water into the stockpot to completely cover the ribs. Gently stir to distribute the sauce and seasonings.
- Bring to a low boil. Place the stockpot over medium-high heat and bring the liquid to a gentle boil.
- Simmer the ribs. Reduce the heat to maintain a steady simmer. Cook the ribs for approximately 40 minutes, allowing them to become tender and absorb the barbecue flavor.
- Preheat the grill. Toward the end of simmering, preheat an outdoor grill to high heat. Lightly oil the grill grate to reduce sticking.
- Transfer the ribs. Carefully remove the ribs from the stockpot using tongs. Reserve the barbecue cooking liquid for basting during grilling, keeping it hot.
- Grill until browned. Arrange the ribs on the preheated grill. Cook for approximately 20 minutes, turning frequently to develop an evenly browned exterior.
- Baste the ribs. Brush the ribs regularly with the reserved barbecue cooking liquid while grilling. Because the liquid has been in contact with raw pork, bring it to a full rolling boil before using it for basting.
- Check for doneness. Continue grilling until the ribs are nicely browned and tender. Pork must reach a minimum internal temperature of 145°F (63°C), followed by a 3-minute rest, although ribs often become more tender at higher temperatures.
Notes
- Simmering method: Cooking the ribs in a mixture of barbeque sauce, onion, and seasonings before grilling helps tenderize the meat and develop flavor.
- Water quantity: Add enough water to cover the ribs during simmering. The exact amount depends on the size of your stockpot.
- Reserved cooking liquid: The simmering liquid is used to baste the ribs while grilling. Bring it to a full rolling boil before basting because it has been in contact with raw pork.
- Grill temperature: Preheat the grill on high, but watch the ribs closely. Barbecue sauce contains sugar, which can burn quickly over intense heat.
- Turning the ribs: Turn frequently to encourage even browning and reduce the risk of scorching.
- Nutrition note: The stated nutritional information includes the full amount of the boiling ingredients. The actual amount of cooking liquid consumed will vary, so the nutritional values per serving may differ.
Tender pork ribs covered in rich barbecue flavor are always a welcome addition to a cookout. This recipe takes a slightly different approach from traditional grilled ribs by simmering the meat in barbecue sauce before placing it on the grill.
The first cooking stage helps the ribs become tender, while the final grilling step creates a browned exterior with concentrated barbecue flavor.
It’s a practical method when you want flavorful ribs without spending several hours tending a smoker.
- Two-step cooking method: Simmering helps tenderize the pork, while grilling gives the ribs a beautifully browned finish.
- Rich barbecue flavor: The ribs cook directly in seasoned barbecue sauce, so the flavor develops before they reach the grill.
- Simple ingredients: You only need pork, barbecue sauce, onion, salt, and pepper.
- Great for outdoor cooking: The ribs are already partially cooked before grilling, making the final stage focused on browning and flavor.
- Easy to serve: Pair the ribs with classic barbecue sides for a satisfying family dinner or casual summer gathering.

Easy Frogmore Stew Recipe (Classic Southern Low Country Shrimp Boil)
Ingredients
Method
- Prepare the ingredients. Gather the potatoes, smoked sausage, corn, shrimp, water, and Old Bay seasoning. Cut the sausage into 2-inch pieces, and husk, clean, and quarter the corn.
- Prepare the seasoned water. Pour 6 quarts of water into a large stockpot. Add ¾ cup Old Bay seasoning and stir to distribute.
- Bring to a boil. Place the stockpot over high heat and bring the seasoned water to a full boil.
- Cook the potatoes. Carefully add the new red potatoes to the boiling water. Cook for approximately 15 minutes, allowing them to begin softening.
- Add the smoked sausage. Add the 2-inch pieces of hot smoked sausage to the pot. Continue boiling for another 5 minutes.
- Add the corn. Place the quartered corn into the stockpot. Cook for another 5 minutes, allowing the kernels to become tender.
- Add the shrimp. Gently stir in the fresh, unpeeled shrimp. Continue cooking for approximately 5 minutes, or until the shrimp turn pink, become opaque, and are fully cooked.
- Drain immediately. Once the shrimp are cooked, carefully drain the contents of the stockpot using a large colander or strainer. Avoid leaving the ingredients sitting in the hot water, as the shrimp can become overcooked.
- Serve hot. Transfer the shrimp, sausage, potatoes, and corn to a large serving platter or serving tray. Serve immediately while everything is warm.
Notes
- Seasoning ratio: Use 2 tablespoons of Old Bay seasoning per quart of water. For 6 quarts of water, this equals ¾ cup.
- Adjusting servings: The recipe can be scaled up or down depending on the number of people you’re serving. Maintain the seasoning-to-water ratio when adjusting quantities.
- Sausage substitutions: If hot smoked sausage is unavailable, use another smoked sausage, such as kielbasa. Add a little crushed red pepper to the cooking water if you want extra heat.
- Fresh shrimp: Use large, fresh, unpeeled shrimp. The shells help protect the shrimp during boiling and contribute flavor.
- Cooking order: Add potatoes first, followed by sausage, corn, and shrimp. Each ingredient requires a different cooking time.
- Avoid overcooking shrimp: Drain the pot as soon as the shrimp are pink, opaque, and cooked through. Shrimp that remain in hot water too long can become rubbery.
- Serving suggestions: Serve Frogmore stew hot on a large platter, or spread the drained ingredients over food-safe paper on a clean table for a traditional Low Country boil presentation.
- Food safety: Shrimp should reach 145°F (63°C). Ensure the smoked sausage is fully heated, and follow package instructions if it is not already fully cooked.
Frogmore stew brings together some of the best flavors of Southern coastal cooking in one big pot. Juicy shrimp, smoky sausage, tender potatoes, and sweet corn cook in a generously seasoned broth, creating a meal that’s simple to prepare and easy to share.
Despite its name, Frogmore stew isn’t actually a thick stew. It’s a traditional South Carolina-style seafood boil, often called a Low Country boil, where the ingredients are cooked in seasoned water and drained before serving.
It’s especially useful when you’re feeding a crowd because most of the work happens in one stockpot, and there’s no need to prepare a complicated sauce.
- A complete one-pot dinner: Shrimp, sausage, potatoes, and corn provide a satisfying combination of protein, vegetables, and bold Southern flavor.
- Perfect for feeding a crowd: The recipe makes 12 servings and can be adjusted for smaller dinners or larger gatherings.
- Ready in about 40 minutes: Even with several ingredients, the cooking process is straightforward and relatively quick.
- Bold Old Bay flavor: The seasoned cooking water flavors every ingredient without requiring a long list of individual spices.
- Fun, casual serving style: Serve everything on a platter or arrange it family-style for a relaxed seafood dinner.
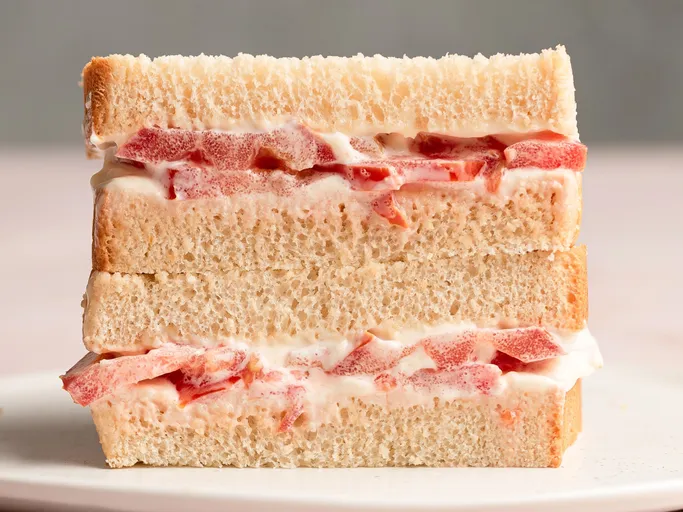
Easy Southern Tomato Sandwich with Mayo (Ready in 5 Minutes)
Ingredients
Method
- Prepare the ingredients. Gather the mayonnaise, white bread, tomato, salt, and pepper. Use a ripe tomato at room temperature for the best flavor.
- Spread the mayonnaise. Place both slices of white bread on a clean work surface. Spread the mayonnaise evenly over one side of each slice, adding a little more if preferred.
- Add the first tomato layer. Arrange 2 tomato slices on one piece of bread, directly over the mayonnaise.
- Season the tomatoes. Sprinkle the first tomato layer with half of the kosher salt and freshly ground black pepper.
- Add the remaining tomatoes. Layer the other 2 tomato slices over the first layer and season with the remaining salt and pepper.
- Assemble the sandwich. Place the second slice of bread on top, mayonnaise side facing down toward the tomatoes.
- Slice and serve. Gently cut the sandwich in half and serve immediately while the bread is soft and the tomatoes are fresh and juicy.
Notes
- Choose ripe tomatoes: Fresh, ripe, juicy tomatoes provide the best flavor. Beefsteak and meaty heirloom varieties are especially suitable.
- Use room-temperature tomatoes: Tomatoes generally have a fuller flavor when served at room temperature rather than straight from the refrigerator.
- Bread choice: Traditional Southern tomato sandwiches are made with soft white sandwich bread.
- Mayonnaise: Use your preferred mayonnaise and adjust the amount to taste. A generous coating adds creaminess and balances the tomatoes’ acidity.
- Season each layer: Dividing the salt and pepper between the tomato layers helps distribute the seasoning evenly.
- Serve fresh: The salt draws moisture from the tomatoes, so the sandwich becomes softer and juicier as it sits. Assemble it shortly before eating.
- Optional variations: Toast the bread for a firmer texture, or add fresh basil or lettuce for a different flavor. These additions are optional and not part of the classic version.
A good Southern tomato sandwich doesn’t need a long ingredient list or complicated preparation. It’s all about using ripe summer tomatoes, creamy mayonnaise, and soft bread to create something fresh, juicy, and satisfying.
What makes this sandwich special is the way the tomato juices mingle with the mayonnaise. A little salt encourages the tomatoes to release their natural moisture, creating a creamy, lightly tangy coating that soaks into the bread.
It’s simple, a little messy, and especially delicious when tomatoes are at their seasonal best.
- Ready in just 5 minutes: No stove, oven, or special equipment is needed.
- Only five ingredients: The recipe uses everyday sandwich ingredients without unnecessary extras.
- Fresh summer flavor: Ripe tomatoes provide natural sweetness, acidity, and plenty of juiciness.
- Creamy and savory: Mayonnaise, salt, and pepper complement the tomatoes without overpowering them.
- Perfect for a quick lunch: It’s easy to assemble when you want something fresh without spending time cooking.

Easy Cheesy Breakfast Grits Recipe (Creamy Southern-Style Grits)
Ingredients
Method
- Gather the ingredients. Measure the water, salt, hominy grits, shredded sharp Cheddar cheese, butter, and freshly ground black pepper.
- Boil the water. Pour 3 cups of water into a medium saucepan. Add the salt and bring the water to a full boil over medium-high heat.
- Whisk in the grits. Gradually add the hominy grits to the boiling water, whisking continuously for 1 minute. This helps distribute the grits evenly and prevents lumps from forming.
- Reduce the heat. Once the mixture returns to a boil, lower the heat to low. Allow the grits to cook at a gentle simmer rather than a rapid boil.
- Cook until thickened. Continue cooking for 10 to 15 minutes, stirring frequently to prevent the grits from sticking to the bottom of the saucepan. The mixture should gradually thicken as the grits soften.
- Remove from heat. Once the grits are tender and have reached a thick, creamy consistency, remove the saucepan from the heat.
- Add cheese and butter. Stir in the shredded sharp Cheddar cheese, butter, and freshly ground black pepper.
- Mix until creamy. Continue stirring until the cheese and butter melt completely and blend into the hot grits.
- Serve warm. Spoon the cheesy grits into serving bowls and enjoy immediately while smooth, creamy, and hot.
Notes
- Whisking: Whisk continuously for the first minute after adding the grits to the boiling salted water. This helps prevent clumps.
- Cooking temperature: Once the water returns to a boil, reduce the heat to low and maintain a gentle simmer.
- Stir frequently: Stir the grits regularly during the 10 to 15 minutes of cooking to help them cook evenly and prevent sticking.
- Cheese and butter: Add the Cheddar cheese and butter only after removing the saucepan from the heat. Stir until completely melted.
- Consistency: This recipe produces thick, hearty grits with a creamy finish. If they become thicker than you prefer, stir in a small amount of hot water to loosen them.
- Cheese flavor: Sharp Cheddar provides a pronounced savory flavor that complements the mild taste of hominy grits.
- Serving: Enjoy immediately for the smoothest consistency, as grits naturally thicken while cooling.
A warm bowl of cheesy grits is a simple way to start the morning with something filling and comforting. The mild flavor of hominy grits pairs beautifully with sharp Cheddar cheese, melted butter, and a little freshly ground black pepper.
This recipe keeps the process straightforward. Everything cooks in one saucepan, and the cheese is stirred in at the end for a creamy finish.
Whether you’re new to cooking grits or looking for a dependable savory breakfast, this version is easy to prepare with basic ingredients.
- Creamy, comforting texture: The grits cook until thick and tender, then become richer with melted cheese and butter.
- Simple pantry ingredients: You only need a few everyday ingredients to make a satisfying breakfast.
- Ready in 30 minutes: The stovetop method is practical for relaxed mornings and weekend breakfasts.
- Rich Cheddar flavor: Sharp Cheddar adds a pleasantly savory taste without overpowering the grits.
- Easy to pair with other foods: Serve them with scrambled eggs, bacon, sausage, or other Southern-inspired breakfast favorites.
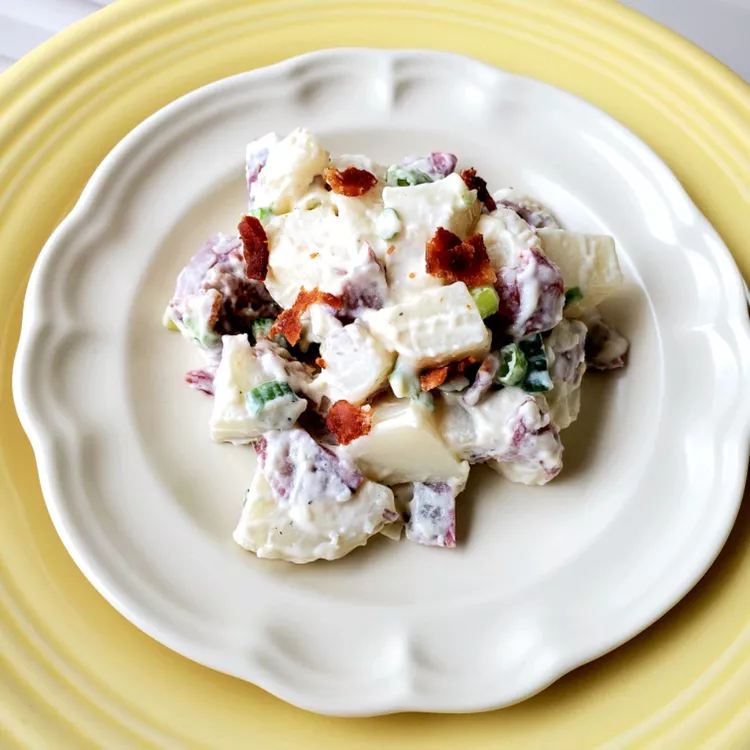
Creamy Texas Ranch Potato Salad with Crispy Bacon
Ingredients
Method
- Prepare the potatoes. Wash the red potatoes thoroughly, leaving the skins on. Bring a large pot of lightly salted water to a boil.
- Boil until tender. Add the whole potatoes to the boiling water and cook for approximately 15 to 20 minutes, or until tender when pierced with a fork.
- Cool and chop. Drain the potatoes and rinse them under cold running water to help cool them. Cut the potatoes into approximately 1-inch cubes.
- Chill the potatoes. Transfer the cubed potatoes to a large serving bowl. Cover and refrigerate until completely chilled.
- Prepare the ranch dressing. In a small mixing bowl, combine the dry ranch dressing mix, mayonnaise, and chopped green onion. Stir until smooth and evenly mixed.
- Refrigerate the dressing. Cover the ranch dressing mixture and refrigerate for at least 1 hour to allow the flavors to blend.
- Cook the bacon. Arrange the bacon slices on a microwave-safe plate lined with paper towels, with additional paper towels over the bacon to catch splatters. Microwave until crisp, approximately 15 minutes, depending on your microwave’s power. Cook in batches if necessary.
- Cool and crumble the bacon. Carefully remove the bacon from the microwave and let it cool. Once cool enough to handle, crumble it into bite-sized pieces.
- Combine potatoes and dressing. Remove the chilled potatoes and ranch dressing from the refrigerator. Pour the dressing over the potatoes and gently toss until evenly coated.
- Add the bacon. Sprinkle the crumbled bacon into the salad and stir briefly to distribute it without breaking apart the potato pieces.
- Serve. Transfer the finished ranch potato salad to a serving dish and serve chilled.
Notes
- Make ahead: The potatoes and ranch dressing can be prepared in advance and refrigerated separately until ready to assemble.
- Potato skins: Leave the skins on the red potatoes for added texture and a rustic appearance.
- Cooling: Refrigerate the cooked potatoes until completely chilled before combining them with the mayonnaise-based dressing.
- Ranch flavor: Allow the ranch dressing mixture to chill for at least 1 hour so the seasoning and green onion flavors can develop.
- Crispy bacon: Cook the bacon until crisp and let it cool before crumbling. Microwave cooking times vary depending on wattage, bacon thickness, and batch size.
- Texture: Toss the potatoes gently with the dressing to prevent the cubes from becoming mashed.
- Serving: Keep the salad refrigerated until serving. For outdoor gatherings, place the serving bowl over ice to keep it cold.
- Storage: Store leftovers promptly in an airtight container in the refrigerator at 40°F (4°C) or below for up to 3 to 4 days.
A good potato salad should be creamy, flavorful, and satisfying without turning into a bowl of mashed potatoes. This Texas ranch potato salad delivers exactly that with tender red potatoes, a savory ranch dressing, crisp bacon, and fresh green onions.
Instead of the usual mustard-heavy potato salad dressing, this version uses mayonnaise mixed with dry ranch seasoning. The result is rich, tangy, and full of familiar ranch flavor.
The bacon brings a salty crunch, while the green onions add freshness that helps balance the creamy dressing.
Here’s why this recipe works especially well for gatherings:
- Big ranch flavor: Dry ranch dressing mix creates a savory, herby coating that pairs naturally with potatoes.
- Crispy bacon in every bite: Bacon adds smoky flavor and a crunchy contrast to the soft potatoes.
- Just five main ingredients: There are no complicated dressing components or unusual ingredients to track down.
- Perfect for feeding a crowd: The recipe makes 16 servings, making it suitable for cookouts, potlucks, and family celebrations.
- Easy to prepare ahead: Both the potatoes and dressing benefit from chilling, so much of the work can be completed before serving