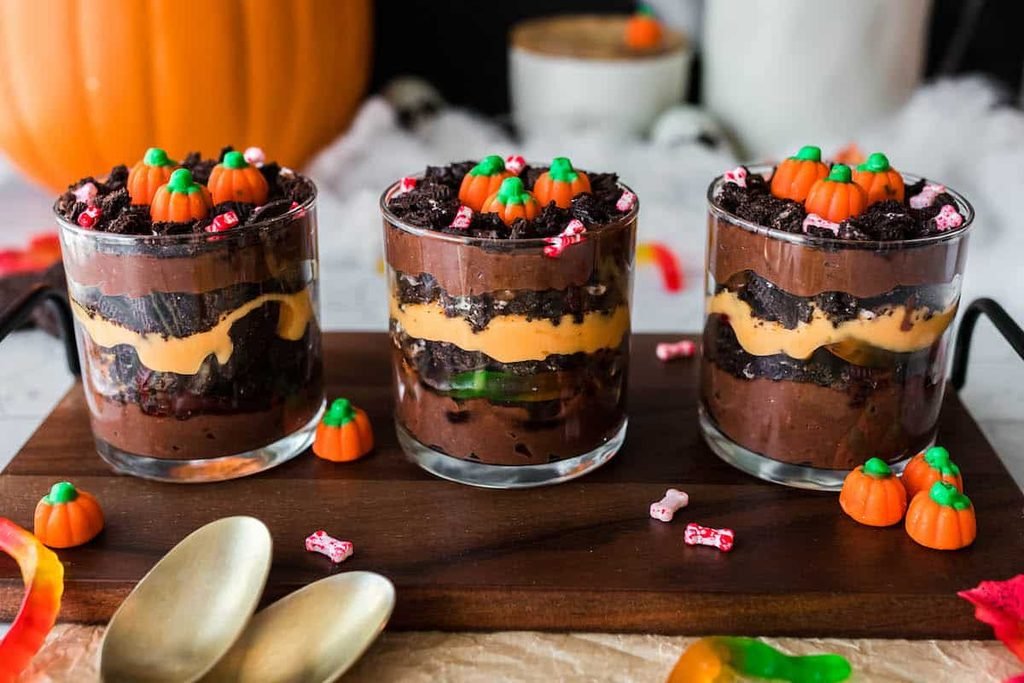
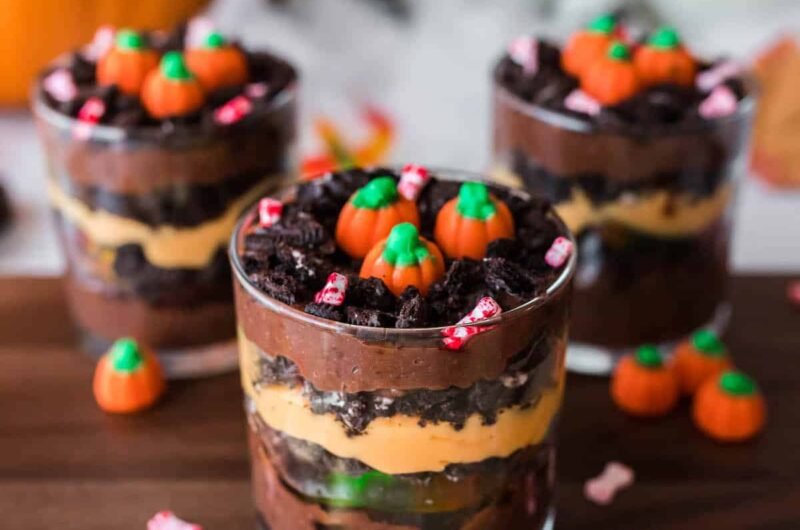
These Halloween Dirt Cake Cups turn two flavors of instant pudding, crushed chocolate sandwich cookies, gummy worms, and pumpkin candies into a playful layered dessert. The individual cups require no baking, can be assembled up to two days ahead, and become even more convincing when served in clear glasses that show every orange-and-chocolate layer.
Jump to Recipe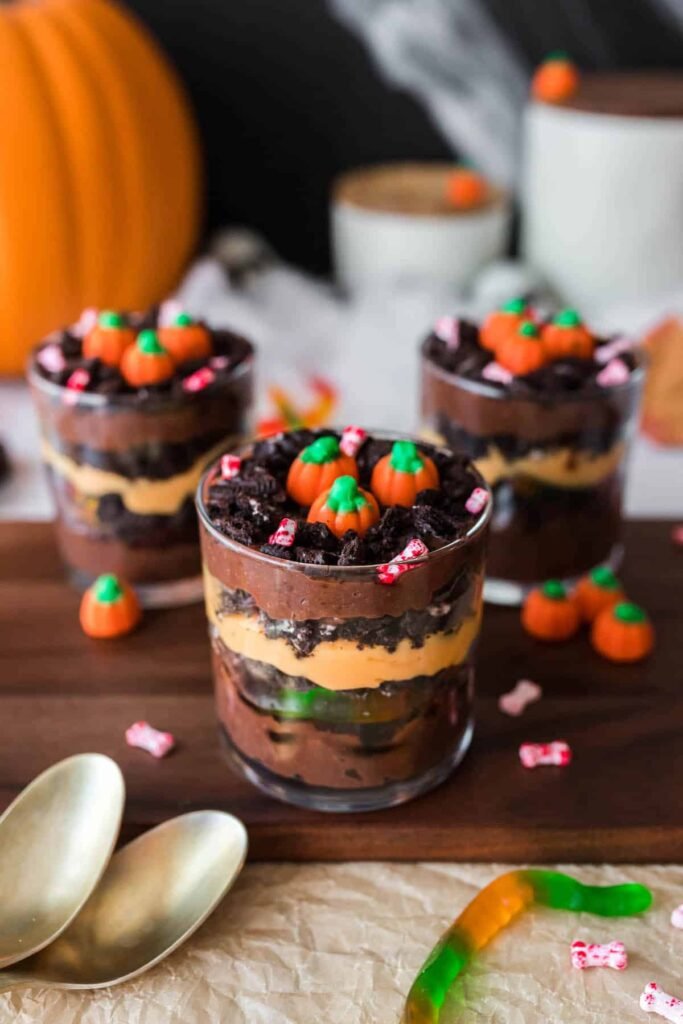
Recipe Snapshot
- Prep Time: 30 minutes
- Chill Time: 120 minutes
- Total Time: 150 minutes
- Yield: 8 servings
- Calories: 443 kcal per serving
- Course: Dessert
- Cuisine: American
- Method: No-bake
- Serving Size: Eight 10-ounce cups
The recipe uses all of the prepared chocolate pudding but only about half of the prepared vanilla pudding. Save the remaining orange-colored vanilla pudding for another dessert or snack.
How the Dessert Is Built
Each cup contains alternating creamy and crunchy layers:
- Chocolate pudding
- Gummy worms
- Crushed Oreos
- Orange vanilla pudding
- More crushed Oreos
- Chocolate pudding
- Final Oreo “dirt”
- Candy pumpkins and optional bone sprinkles
Following the same order in every glass gives the cups a consistent appearance and ensures each serving contains pudding, cookie crumbs, and candy.
Why This Dessert Works for Halloween
- No oven is required. Both puddings are prepared with milk and chilled before assembly.
- The presentation is built into the recipe. Orange pudding, dark cookie crumbs, worms, pumpkins, and bones create the Halloween theme.
- It is designed for advance preparation. The cups need at least two hours in the refrigerator and can be made up to two days before serving.
- Individual portions are easy to serve. Guests can pick up a prepared cup without cutting or plating a larger dessert.
- The textures change as the cups rest. The cookie layers gradually soften against the pudding while some crumbs on top retain more texture.
Ingredients and What They Contribute
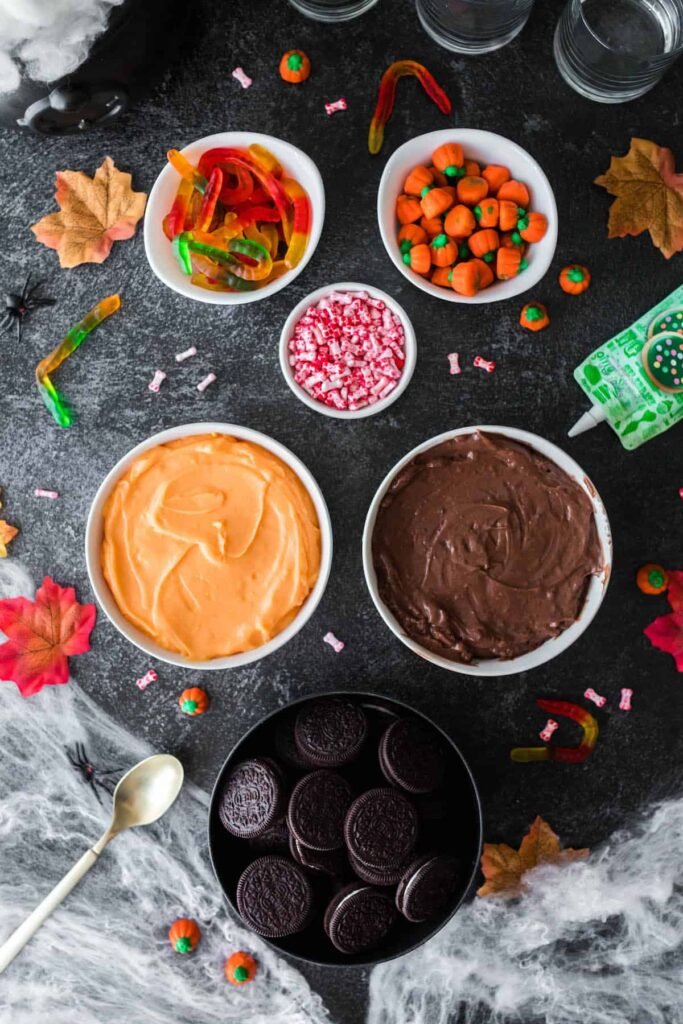
Chocolate and Vanilla Pudding
- 4 cups milk, divided
- 1 box instant chocolate pudding mix, 3.4 ounces
- 1 box instant vanilla pudding mix, 3.4 ounces
- Orange food coloring
Chocolate pudding creates the dark base and upper layer. Vanilla pudding is colored orange to provide contrast and make the separate layers visible through the glasses.
Prepare each pudding in its own bowl. Keeping them separate is important because the colors and flavors are layered rather than blended.
Oreo Dirt
- 22 Oreo cookies, crushed
Crushed Oreos provide the dark “soil” effect. The cookies do not need to become a perfectly fine powder. A mixture of small crumbs and slightly larger pieces gives the dessert a more varied texture.
Halloween Candy Decorations
- 1 cup gummy worms
- 24 pumpkin candies
- 2 tablespoons bone sprinkles, optional
The gummy worms are placed inside the cups, where they appear to move through the pudding and cookie layers. Three pumpkin candies top each of the eight servings.
Bone sprinkles are optional but add another recognizable Halloween detail.
Equipment
- Two mixing bowls
- Whisk
- Measuring cup
- Mixing spoon or flexible spatula
- Food processor or rolling pin
- Gallon-size freezer bag, if crushing cookies by hand
- Eight 10-ounce clear glasses or dessert cups
- Plastic wrap or fitted lids
Clear containers are the most useful choice because the layers are a major part of the presentation.
Prepare the Components
Make the two puddings separately
Divide the milk as needed to prepare the chocolate and vanilla pudding mixes in separate bowls. Follow the package directions for mixing and initial chilling.
The puddings should thicken before you begin layering. Pudding that is still loose can run into neighboring layers and make the colors less distinct.
Color the vanilla pudding
Add a few drops of orange food coloring to the prepared vanilla pudding and stir until the color is even.
Add more coloring gradually until you reach the desired shade. Adding too much at once makes the color difficult to correct.
If orange coloring is unavailable, combine four drops of traditional red liquid food coloring with five drops of yellow. Concentrated gel coloring is stronger, so it requires less.
Crush the cookies
Place the Oreos in a gallon-size freezer bag, press out excess air, and seal it. Roll a rolling pin over the bag until the cookies break into crumbs.
A food processor can also be used. Stop before the cookies become excessively fine if you want the dirt layer to have more texture.
Assemble the Dirt Cake Cups
Start with chocolate pudding
Divide half of the chocolate pudding among the eight glasses. Smooth the pudding into an even bottom layer.
Try to place the pudding in the center of each glass before spreading it outward. This helps keep the sides cleaner and makes the finished layers easier to see.
Add worms and the first dirt layer
Divide the gummy worms over the chocolate pudding. Position some near the sides of the cups so they remain visible.
Sprinkle one-third of the crushed Oreos over the worms. Spread the crumbs gently without pressing them deeply into the pudding.
Create the orange center
Use half of the prepared orange vanilla pudding for the recipe. Divide it among the glasses and spread it carefully over the cookie crumbs.
Reserve the remaining orange pudding for another use.
Sprinkle another one-third of the Oreo crumbs over the orange layer.
Finish with chocolate and cookies
Divide the remaining chocolate pudding among the cups. Smooth the surface, then cover it with the remaining crushed Oreos.
The final cookie layer should conceal most of the pudding so the surface resembles loose soil.
Decorate the tops
Place three candy pumpkins on each cup. Add optional bone sprinkles.
If using Milano cookies as edible tombstones, insert them shortly before serving so they do not soften too much in the pudding.
Cover and chill
Cover every cup tightly with plastic wrap or a fitted lid. Refrigerate for at least 120 minutes.
The cups can remain refrigerated for up to two days. The supplied recipe information notes that the flavor and texture are best after approximately 24 hours of chilling.
How to Keep the Layers Neat
A neat dessert cup depends more on pudding consistency and careful portioning than speed.
- Chill both puddings until thick before assembling.
- Use separate spoons or spatulas for the chocolate and orange puddings.
- Add pudding to the center of each cup before spreading it toward the edges.
- Wipe the inside edge of the glass if pudding smears above its intended layer.
- Sprinkle cookie crumbs lightly instead of pressing them down.
- Assemble all eight cups one layer at a time to distribute each component evenly.
- Add delicate cookie tombstones close to serving time.
A piping bag or food-storage bag with one corner trimmed can also help place pudding neatly, but it is optional.
Flavor and Presentation Adjustments
Deeper chocolate flavor
Stir a small pinch of sea salt into the chocolate pudding. The salt should remain subtle; its purpose is to balance sweetness rather than make the pudding taste salty.
Graveyard cups
Insert Milano cookies into the top Oreo layer to resemble tombstones. Add them shortly before serving so they remain more structured.
More visible gummy worms
Place a few gummy worms against the sides of the clear glasses during assembly. They will be more noticeable than worms positioned only in the center.
Simpler decoration
The pudding-and-cookie layers already provide a Halloween color scheme. If bone sprinkles are unavailable, the cups can be finished with only the three pumpkin candies specified for each serving.
Troubleshooting
Problem: The pudding layers are running together
Likely cause: The pudding was assembled before it had thickened sufficiently.
Solution: Prepare and chill each pudding separately before layering. If it still pours like a thin liquid, give it more time to set.
Problem: The orange pudding is too dark
Likely cause: Too much food coloring was added at once.
Solution: Add coloring a few drops at a time. Gel coloring is concentrated and should be used especially sparingly.
Problem: The Oreo layer disappears into the pudding
Likely cause: The crumbs were pressed down or covered while the pudding was too loose.
Solution: Use properly thickened pudding and sprinkle the crumbs gently over each layer.
Problem: The sides of the glasses look messy
Likely cause: Pudding touched the upper portions of the glasses during portioning.
Solution: Spoon or pipe each pudding layer into the center first. Clean visible smears before adding the next layer.
Problem: The cookie crumbs become soft
Likely cause: The cups have chilled for several hours or overnight.
Solution: Some softening is expected where the crumbs contact pudding. For more contrast, reserve part of the final Oreo layer and add it shortly before serving.
Problem: The pumpkin candies change texture in storage
Likely cause: Extended refrigeration can affect exposed candy.
Solution: Remove the pumpkins before storing leftovers and replace them with fresh candies before serving again.
Make-Ahead Schedule
Two days before serving
Prepare and assemble the cups, cover them tightly, and refrigerate. Consider waiting to add cookie tombstones and delicate decorations.
One day before serving
This is an especially useful time to assemble the dessert because the supplied recipe notes its best flavor and texture after approximately 24 hours of chilling.
Shortly before serving
Add Milano tombstones, replace any decorations that have changed texture, and uncover the cups only when they are ready to go to the table.
Storage
Keep the dirt cake cups tightly covered in the refrigerator for up to two days.
Leftovers should also be refrigerated promptly and kept covered. The cookies will soften further over time, and refrigerated candy decorations may change texture.
Freezing is not recommended in the supplied recipe. Refrigeration is the intended storage method for maintaining the layered pudding texture.
Serving Suggestions
Serve the cups cold with dessert spoons. They work well as individual treats for:
- Halloween parties
- Classroom celebrations where homemade food is permitted
- Movie nights
- Fall dessert tables
- Family Halloween dinners
- Make-ahead party menus
Keep the cups refrigerated until close to serving because the dessert is made primarily from milk-based pudding.
Equipment
- Two mixing bowls
- Whisk
- Spoon or spatula
- Measuring cup
- Rolling pin and gallon freezer bag or food processor
- Eight 10-ounce clear dessert cups
- Plastic wrap or fitted lids
Halloween Dirt Cake Cups
Course: DessertCuisine: American8
servings30
minutes2
hours443
kcal2
hours30
minutesIndividual no-bake Halloween desserts layered with chocolate pudding, orange vanilla pudding, crushed Oreos, gummy worms, and pumpkin candies.
Ingredients
4 cups milk, divided, for preparing the puddings
1 box (3.4 ounces) instant chocolate pudding mix
1 box (3.4 ounces) instant vanilla pudding mix
Orange food coloring
1 cup gummy worms
22 Oreo cookies, crushed
24 pumpkin candies
2 tablespoons bone sprinkles, optional
Instructions
- Divide the milk as needed and prepare the chocolate and vanilla pudding mixes in separate bowls according to their package directions. Chill until thickened.
- Add a few drops of orange food coloring to the vanilla pudding. Stir thoroughly and add more coloring gradually until the desired shade is reached.
- Divide half of the prepared chocolate pudding among eight 10-ounce clear glasses. Spread it into an even bottom layer.
- Divide the gummy worms among the glasses.
- Sprinkle one-third of the crushed Oreos over the gummy worms.
- Divide half of the orange vanilla pudding among the cups. Reserve the remaining orange pudding for another use.
- Sprinkle another one-third of the crushed Oreos over the orange pudding.
- Divide the remaining chocolate pudding among the cups.
- Cover the chocolate pudding with the remaining Oreo crumbs.
- Place three pumpkin candies on each cup and add bone sprinkles if desired.
- Cover the cups tightly and refrigerate for at least 120 minutes or for up to two days before serving.
Notes
- The recipe uses all the prepared chocolate pudding and approximately half the prepared vanilla pudding.
- Eight 10-ounce glasses produce the stated eight servings.
- Crush the Oreos in a sealed freezer bag with a rolling pin or pulse them in a food processor.
- The cookie crumbs do not need to be completely fine.
- To make orange with traditional liquid coloring, combine four drops of red with five drops of yellow. Concentrated gel coloring requires less.
- A small pinch of sea salt can be mixed into the chocolate pudding.
- Add Milano cookie tombstones shortly before serving.
- The cups must chill for at least two hours.
- The supplied recipe information notes that the flavor and texture are best after approximately 24 hours of chilling.
- Store tightly covered in the refrigerator for up to two days.
- Consider replacing refrigerated pumpkin candies before serving leftovers if their texture changes.
Nutritional Information
Estimated per serving:
- Calories: 443 kcal
- Carbohydrates: 81 g
- Protein: 8 g
- Fat: 11 g
- Saturated Fat: 4 g
- Polyunsaturated Fat: 1 g
- Monounsaturated Fat: 4 g
- Trans Fat: 0.02 g
- Cholesterol: 15 mg
- Sodium: 451 mg
- Potassium: 291 mg
- Fiber: 1 g
- Sugar: 57 g
- Vitamin A: 198 IU
- Calcium: 159 mg
- Iron: 4 mg
Nutritional Information Disclaimer
Nutrition information is an estimate and may vary depending on the pudding, cookies, candies, milk, decorations, and actual serving sizes used.
How large should the serving cups be?
Use eight 10-ounce glasses or dessert cups. This size accommodates the pudding, cookie, candy, and decorative layers without overcrowding the top.
Do I use all of both pudding flavors?
No. Use the entire prepared box of chocolate pudding and approximately half of the prepared vanilla pudding. The remaining orange vanilla pudding is reserved for another use.
How long do Halloween dirt cups need to chill?
They need to chill for at least 120 minutes. They can be prepared up to two days ahead, and the supplied recipe information notes the best texture and flavor after approximately 24 hours.
Can I make orange coloring without buying orange food dye?
Yes. With traditional liquid coloring, combine approximately four drops of red with five drops of yellow. Use less if working with concentrated gel coloring.
Should Oreo cookies be crushed with the filling?
Yes. Crush the complete sandwich cookies. The filling becomes part of the crumb mixture.
Do the Oreo crumbs need to be very fine?
No. They can contain a mixture of fine crumbs and small cookie pieces. A slightly uneven texture makes the dirt layer more interesting.
Can I add tombstone cookies ahead of time?
It is better to add Milano cookie tombstones shortly before serving. Extended contact with pudding can soften them.
Can Halloween dirt cake cups be frozen?
Freezing is not part of the supplied method. Refrigeration is preferable because freezing and thawing may alter the pudding, cookies, and candy textures.